
Introduction
Drawing frogs can be a fun and creative activity for both children and adults. Whether you're an art enthusiast or just looking for a simple yet delightful design to create, this article will guide you through the process of drawing a frog in a simple and easy way. With step-by-step instructions and helpful tips, you'll be able to create your own charming frog drawing in no time.
Gathering Supplies
Before starting your frog drawing, it's essential to gather all the necessary supplies. You'll need a pencil, eraser, drawing paper, and coloring tools such as markers, colored pencils, or watercolors. Having these materials ready will ensure a smooth drawing experience.
Step 1: Basic Shapes
Begin by drawing a large oval shape for the frog's body. This will serve as the foundation of your drawing. Then, add two smaller circles on top of the oval shape to represent the frog's eyes. Make sure to leave enough space between the circles for the frog's snout.

Step 2: Eyes and Snout
Now, it's time to add more details to the frog's face. Draw two slightly curved lines within each eye circle to form the eyelids. Then, within these curved lines, draw two smaller circles for the pupils. To create the snout, draw a small triangular shape below the eyes, connecting them together.

Step 3: Mouth and Legs
Next, draw a wide smile-shaped line below the snout to form the frog's mouth. Extend the line slightly on both ends to create a cheerful expression. Now, it's time to add the legs. Draw two curved lines extending from the bottom of the frog's body. These lines will serve as guidelines for the legs.

Step 4: Feet and Webbed Toes
To complete the frog's legs, draw two elongated shapes at the end of each leg guideline. These shapes will represent the feet. Then, add curved lines to divide each foot into three sections, creating the webbed toes. Make sure the toes are evenly spaced and proportionate to the feet.

Step 5: Body Details
Now that the basic structure of the frog is complete, it's time to add some details to its body. Draw a wavy line along the edge of the frog's body to create a textured appearance. You can also add small curved lines on the frog's snout to represent nostrils.
Step 6: Finalizing the Drawing
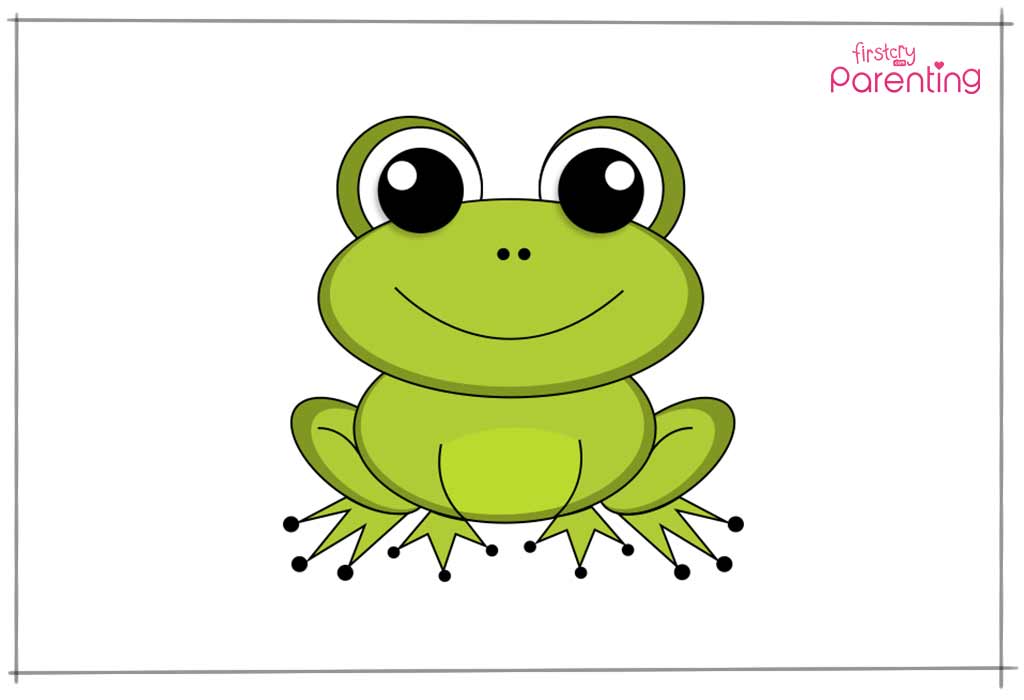
It's time to give your frog drawing its final touch! Carefully trace over your pencil lines with a pen or marker to make them more defined. Once the ink is dry, erase any remaining pencil lines. Now, you can bring your frog to life by coloring it with your favorite shades. Use greens and yellows to mimic the vibrant colors of a real frog.
Conclusion
Drawing a simple frog can be a delightful and relaxing experience. By following the step-by-step instructions provided in this article, you can create a charming frog drawing that will surely impress. Remember to have fun and let your creativity flow as you bring your frog to life on paper.
